title: Quick Start Guide navigation: true
Quick Start Guide
Getting your WiCAN Pro up and running takes just a few minutes. This guide will walk you through powering the device, connecting to its initial setup network, and getting it onto your home Wi-Fi.
Step 1: Power the Device
The WiCAN Pro is powered directly from your vehicle's OBD2 port.
- Locate your vehicle's OBD2 port (usually under the dashboard on the driver's side).
- Plug the WiCAN Pro in.
- You should see the LED indicators light up, meaning the device is booting.
Step 2: Connect to the WiCAN Access Point
When powered on for the first time (or when it cannot find a known Wi-Fi network), the WiCAN Pro broadcasts its own Wi-Fi network.
- Open the Wi-Fi settings on your phone or laptop.
- Look for a network named
WiCAN_xxxxxx(the x's will be unique to your device's MAC address). - Connect to this network. The default password is
@meatpi#. (Note: You must change this later for security!)
Step 3: Access the Web Interface
- Once connected to the WiCAN's Wi-Fi, open a web browser.
- Navigate to
http://192.168.0.10. - You should now see the WiCAN Pro's main Status Dashboard.
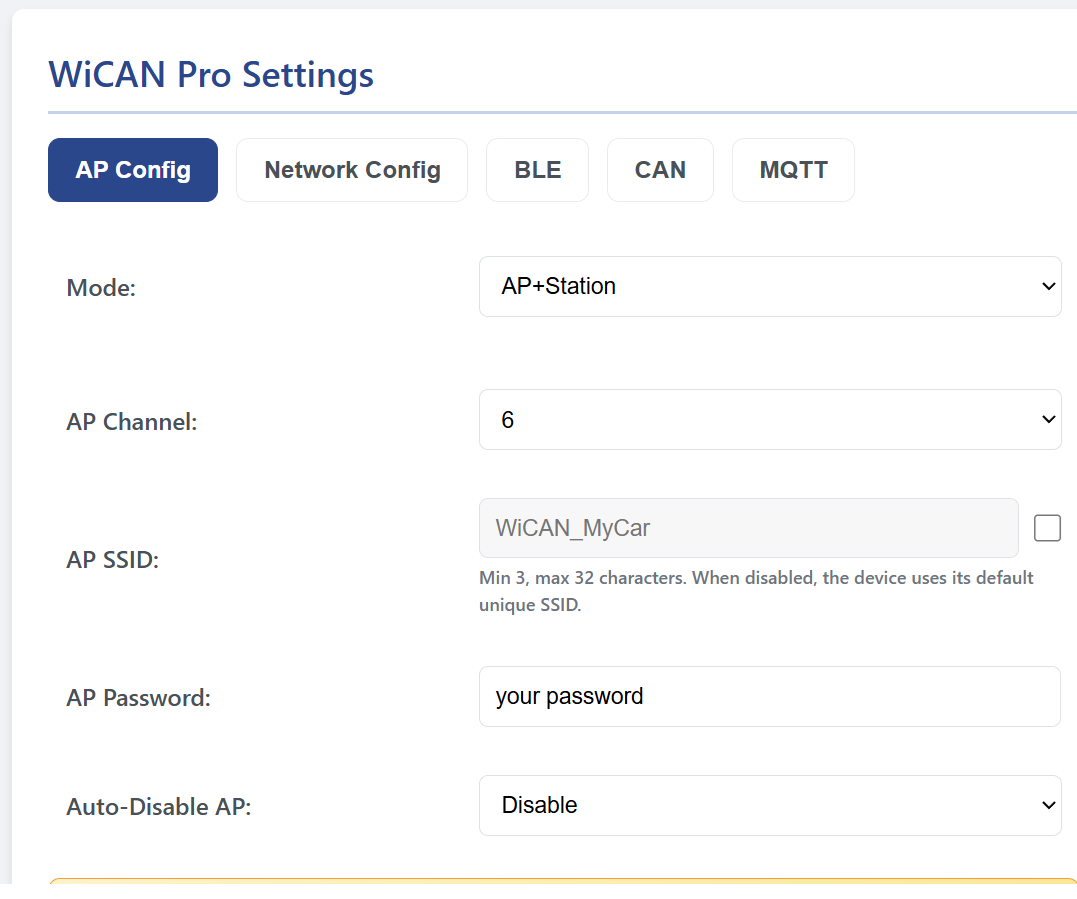
- Click on the Settings tab in the sidebar. You will see 5 configuration tabs at the top: AP Config, Network Config, BLE, CAN, and MQTT.
Step 4: Configure AP and Station Modes
To get the most out of the WiCAN Pro, you want to set it up to connect to your local network while maintaining direct access if needed.
Understanding the Modes:
- AP (Access Point): The WiCAN creates its own direct Wi-Fi network (this is what you are connected to right now).
- Station: The WiCAN connects to an existing router, like your home Wi-Fi or a phone hotspot.
- In the AP Config tab, ensure the Mode dropdown is set to
AP+Station. - Change the AP Password from the default
@meatpi#to a secure password of your choosing. - Click Submit Changes at the bottom of the screen.
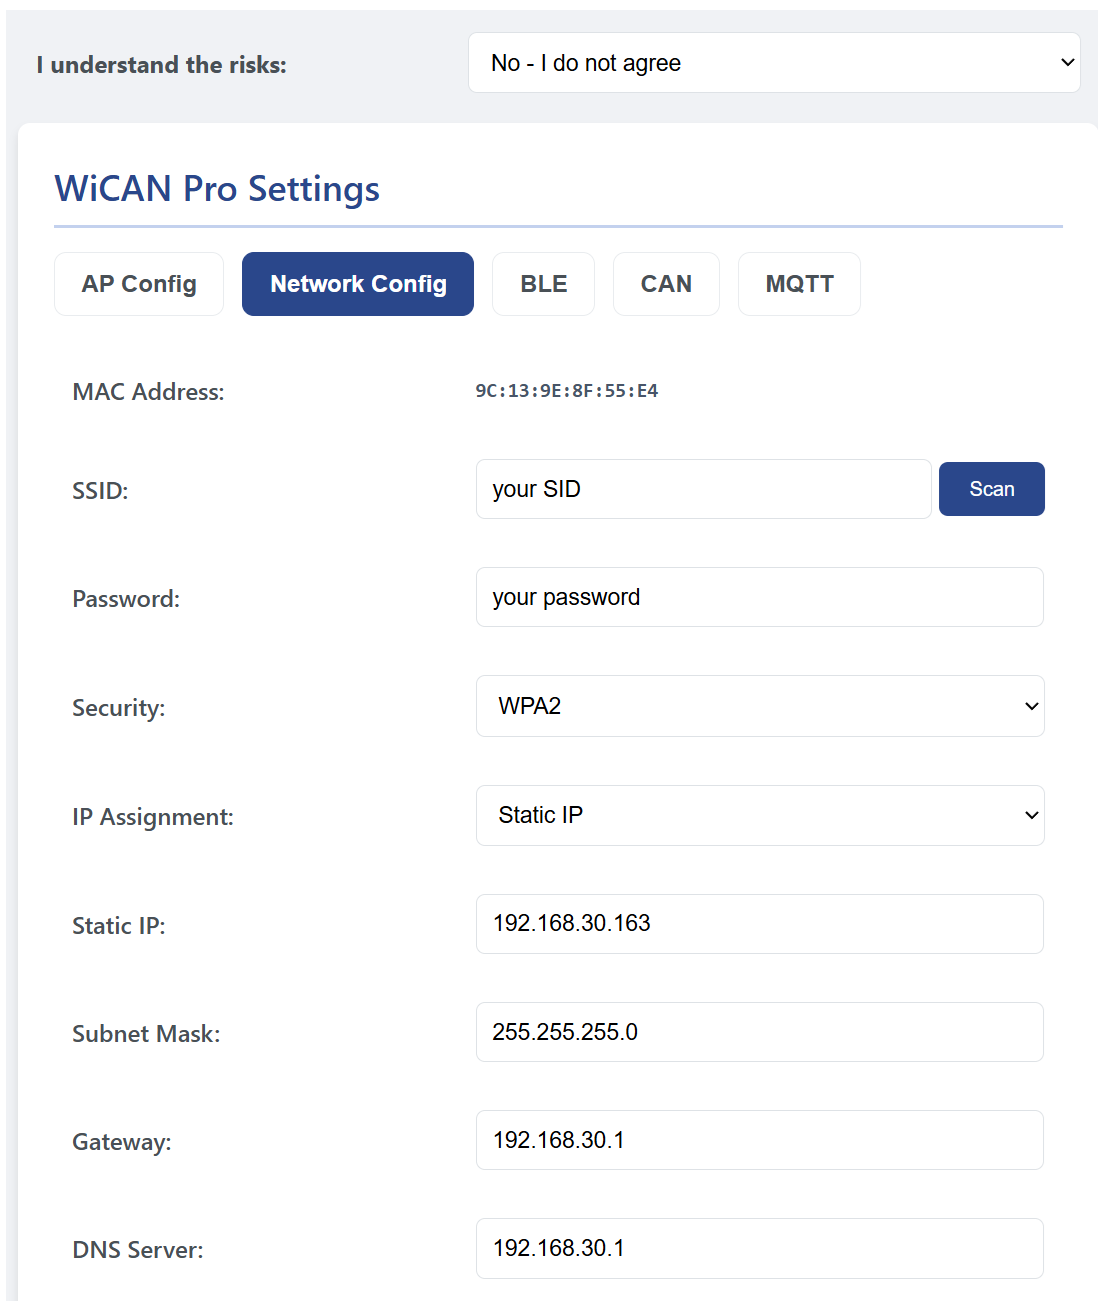
Step 5: Connect to your Home Wi-Fi
Now, let's configure the Station side to connect to your main network.
- Click on the Network Config tab.
- At the top of this page, take note of your device's MAC Address (useful if you need to set reservations on your home router).
- Click the Scan button next to the SSID field and select your home Wi-Fi network.
- Enter your home Wi-Fi Password.
- Choose your IP Assignment method:
- DHCP: Your router will automatically assign an IP address to the WiCAN. This is the easiest method.
- Static IP: You manually define the IP, Subnet, Gateway, and DNS. If you choose this, fill out the required fields to match your network.
- Click Submit Changes at the bottom of the screen.
- Go to the System tab and click Reboot.
The WiCAN Pro will restart and connect to your home network. You can now access the web interface using its new local IP address assigned by your router!